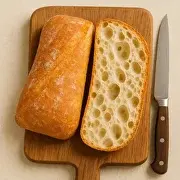
A good baguette does not need sourdough or a complicated multi-day schedule.
Poolish is one of my favorite ways to bring more flavor into a simple yeasted dough. It takes only a few minutes to mix the night before, and by the next day it gives the dough a completely different character: better aroma, a lighter crumb, and a crust that becomes beautifully crisp in a hot oven.
This is also a very forgiving way to make baguettes at home.
You do not need professional equipment or perfect shaping. What matters more is learning to recognize what the dough is telling you along the way.
What Is Poolish?
Poolish is a wet preferment made with equal amounts of flour and water and a very small amount of yeast.
Instead of mixing all the ingredients into the final dough at once, part of the flour is fermented ahead of time.
During those hours, the poolish develops bubbles, aroma and flavor.
When it is added to the final dough, it helps create bread with a more interesting flavor than a quickly mixed straight dough.
For baguettes, it works especially well because it gives us flavor without making the process unnecessarily complicated.
RECIPE
Poolish Baguette Recipe
Crispy homemade baguettes with a light crumb and deep flavor.
Makes2–3 baguettes
Poolish10–12 hours
Bake20–25 min
Oven240–250°C
For the Poolish
Bread flour200 g
Water, room temperature200 g
Instant dry yeast0.5 g
For the Final Dough
All of the poolish400 g
Bread flour300 g
Water150–170 g
Salt8–9 g
Instant dry yeast1 g
Make the Poolish the Night Before
Mix 200 g flour, 200 g water and 0.5 g dry yeast in a bowl.
There is no need to knead it. Simply mix until you no longer see dry flour.
Cover the bowl and leave it at room temperature for approximately 10–12 hours.
The exact time is not as important as the condition of the poolish.
When it is ready, the surface should be full of bubbles and the mixture should have expanded noticeably. It should smell pleasantly fermented, slightly sweet and wheaty rather than strongly alcoholic.
A poolish that has just started to flatten or sink slightly is still perfectly usable for this baguette.
Mix the Dough
Add the poolish to a large bowl.
Pour in 150 g of the water and add the yeast and flour.
Mix until everything comes together into a rough dough.
At this stage I prefer not to add all the remaining water immediately. Flour behaves differently from one kitchen to another, so it is better to see how the dough feels first.
Leave the dough for about 20–30 minutes.
Then add the salt.
If the dough feels stronger and can accept more water, gradually work in some or all of the remaining 20 g.
The final dough should feel soft and slightly sticky.
It should not be stiff.
At the same time, it should not behave like a completely liquid dough that cannot hold any structure. That balance becomes easier to recognize with practice.
Bulk Fermentation and Folding
Cover the dough and leave it to ferment at room temperature for approximately 2–3 hours.
During the first part of bulk fermentation, give it 2–3 sets of folds about 30–40 minutes apart.
You will notice the dough changing after each fold.
At first it may feel loose and sticky.
Later it becomes smoother, more elastic and noticeably better at holding itself together.
This is one of the reasons I prefer folding to simply adding extra flour whenever a dough feels sticky.
Flour is not always the solution.
Sometimes the dough simply needs time and a little help developing its structure.
By the end of bulk fermentation, the dough should have visibly increased in volume and should feel aerated and alive.
Do not wait for it to double exactly. Temperature, flour and yeast activity can all change the timing.
Watch the dough rather than relying only on the clock.
Divide and Pre-Shape
Turn the dough carefully onto a lightly floured work surface.
Try not to press all the gas out of it.
Divide it into 2 or 3 pieces, depending on the size of baguettes you want and the size of your oven. Gently pre-shape each piece into a short log.
Cover and allow the pieces to rest for approximately 15–20 minutes.
This rest matters.
If you try to stretch the dough immediately after dividing it, it may resist and shrink back. After a short rest, the gluten relaxes and shaping becomes much easier.
Shape the Baguettes
Working with one piece at a time, gently flatten it just enough to create an even shape.
Fold the dough toward the center and seal it lightly.
Then roll and lengthen the dough with your hands.
Do not force it.
If it refuses to stretch, give it another few minutes of rest.
The goal is not to squeeze every bubble out of the dough. A baguette needs enough tension to hold its shape, but aggressive handling can destroy the airy structure you spent hours developing.
How to Proof Baguettes Without a Professional Couche
At home, you can proof baguettes on a floured kitchen towel, baker's couche or parchment paper. If you use a towel, make folds of fabric between the baguettes.
These little walls support the sides of the dough and prevent the baguettes from spreading into each other.
You can do something similar with parchment by lifting the paper between the loaves to create small dividers.
Leave the shaped baguettes to proof for approximately 40–60 minutes.
They should become slightly fuller while still keeping some tension.
For baguettes, I would rather bake them a little early than allow them to become completely overproofed and fragile.
Need help with the final proof? Read my guide on How to Proof Baguettes at Home Without Losing Their Shape, where I explain how to use a baker’s couche, kitchen towel, or parchment paper and how to tell when your baguettes are ready to bake. How to Proof Baguettes at Home Without Losing Their Shape
Score the Baguettes
Preheat the oven thoroughly to 240–250°C / 465–480°F.
If you have a baking stone or steel, preheat it together with the oven.
Transfer the baguettes carefully to your baking surface.
Use a sharp blade to make several overlapping cuts along the length of each baguette.
The blade should be held at a shallow angle rather than cutting straight down.
Good scoring gives the expanding dough somewhere to open during the first minutes of baking.
Bake With Steam
Steam is especially important at the beginning of baking.
It delays the setting of the crust just long enough for the baguette to expand.
Bake the baguettes for approximately:
10 minutes with steam, then 10–15 minutes without steam.
The exact time depends on their size and your oven.
For the second part of baking, remove the steam source if necessary and allow the crust to become deeply golden and crisp.
A finished baguette should feel surprisingly light when you pick it up.
And however tempting it is to cut one immediately, give it at least a little time to cool.
What Makes This Baguette Different?
The biggest difference is not that poolish makes a baguette dramatically more difficult.
It actually gives you more flavor without asking much more work from you.
You mix one small bowl the evening before and let fermentation do the rest.
By the next day, that simple mixture of flour, water and a tiny amount of yeast has developed aroma that a quickly mixed dough simply cannot produce in the same way.
Your first homemade baguette may not look exactly like one from a French bakery.
That is fine.
I would pay much more attention to the crust, aroma and crumb than to whether every loaf is perfectly identical.
Once you begin watching how the dough changes from mixing to folding, shaping and proofing, baguettes become much easier to understand.
And that is when a recipe stops being just a set of instructions and starts becoming bread you know how to make.
Who Is This Recipe For?
This recipe is a good next step if you already feel comfortable baking simple pan bread and want to try a more traditional French-style loaf.
It is also a good choice when you are ready to give fermentation a little more time. The poolish is mixed the night before, and the baguettes can be shaped and baked the following morning.
A Note About Steam
Steam makes a big difference when baking baguettes. It keeps the crust flexible during the first minutes in the oven, allowing the loaves to expand before the crust sets.
If your oven does not have a steam function, place an empty metal pan on the bottom rack while the oven preheats. Just after loading the baguettes, carefully pour a small amount of boiling water into the hot pan.
This helps create the thin, crisp, almost glass-like crust that makes a freshly baked baguette so special.